Showing posts sorted by relevance for query contour. Sort by date Show all posts

Friday, January 25, 2013

7 Steps To Flawless Foundation Face

 Here it is! My much requested re-make of my FLAWLESS FOUNDATION VIDEO!
And below, here's how it looks with make-up on top:
Ever wonder why celebrities look so great all the time?
They have a make-up artist that will probably spend more time getting the skin (AKA foundation) to look perfect than on anything else!

With these 7 Steps (and you don't have to do them all, just take what ya' like and leave out what you think is too much!) to a FLAWLESS FACE will leave people wanting to know the secret to your amazing skin.

Watch the video to see how to do and I'll put all the steps and links to what I used below:

h

STEP 1- MOISTURIZE
1. Apply Self-Tanner to clean face (optional- I didn't use any myself)
2. Moisturize Your Face
3. Apply lip balm to get lips plump and soft for make-up and lipcolor later

STEP 2- PRIME TIME
I actually like using BB creams (Beauty Balms), because they act like a primer but do even more!

STEP 3- FOUNDATION
I suggest buying 2, one that matches your skin perfectly and one that is a couple shades darker to make you like more "alive" and it will slenderize your face when applied how I show in the video!

STEP 4- CONCEAL IT
This is where you want to really conceal any blemishes, under eye circles, discolorations, sun spots, age spots, or maybe in freckles if you don't like them, like I don't like mine! ha ha ha
*make sure you get around the nostrils, mouth and eyes really well!

STEP 5- POWDER
YOU must powder your face to "SET" your make-up- if you don't, that's how it looks liek all your make-up vanished a few hours late!
*If you don't want to powder your whole face- at least powder your eyelids to make sure you have a dry surface before you apply eyeshadow!

STEP 6 -  "BRON-TOURING" (yes, I made that up, in case you hear others use it!ha ha ha)
This is basic contouring, which will add depth and slenderize your face, make your cheekbones pop and so on. I just use a MATTE (no shimmer or sparkle at ALL) bronzer to contour as I show in the video.

STEP 7- CHEEK DAZZLE
Your face will "come alive" as you do this last "icing on the cake" step. Just add a peachy-pink blush for a healthy glow and a pinky-shimmer highlighter on the top of your cheekbones and down the center of the nose (if you want)...and your face is ready for any make-up look, or just mascara if you want!

Here's some linky-dinks to all the stuff I used in the video:

BEAUTY BLENDER MAKE-UP SPONGE- it makes the biggest difference!!!

 Lip Balm: I love TREAT BEAUTY, the OLD FASHIONED JUMBO SOFT CANDY BUTTERCREAM LIP BALM

BB CREAMS (you can use them as primers, because they have even more ingredients that regular ol' primers):

DRUGSTORE PRIMER- L'Oreal Magic Skin BB Cream:

LUXURY BRAND PRIMER- Urban Decay Naked Skin Beauty Balm

FOUNDATIONS:

Drugstore Favorite Foundation- L'Oreal True Match Lumi Healthy Skin Foundation

HIGH END FOUNDATION- Cover FX Total Cover Cream Foundation:

PRO FOUNDATION PALETTE- RCMA 18 Color Foundation Palette (I have the Kehoe KO one):

FACE POWDERS:

Drugstore Fav- L'Oreal Naturelle Translucent Powder

High End Fav: La Mer The Powder (it is pricey, but amazing!)

POWDER CONTOUR COLORS:

DRUGSTORE FAVS: Revlon PhotoReady

HIGH END: MAC- I just use a dark powder to contour

BLUSH~
ANY ROSEY-PINK-PEACH COLOR
*I used a limited edition color from MAC, that I wish they'd make again, called LOVECLOUD, but some dupes from MAC POWDER BLUSH are:
WELL DRESSED
&
FLEUR POWER

CONTOUR & HIGHLIGHT CRAYONS:

I used L'Oreal TruMatch Super Blendable Crayon Concealer (I'm kinda in love with these!)

HIGHLIGHTER:
*I used another limited edition BEAUTY POWDER from MAC (that I wished they'd make again, because it's amazing!) but another dupe is:

MAC Iridescent Loose Powder in Silver Dusk

DARK POWDER CONTOUR:

DRUGSTORE FAVE:
Revlon PhotoReady Bronzer

HIGH END DARK CONTOUR:
MAC Studio Careblend Pressed Powder in Dark

Go ahead and pin this, share this, tweet this, and share the beauty tricks with everyone too!
Huge hugs and flawlessness....your kandee

Monday, January 3, 2011

HOW TO: Contour (slenderize your face!)

I have a roundish face...these are my PRO FACE Slenderizing AKA Contouring tricks!

The red areas are where you want to "shade" with your darker color foundation or powder to contour your face to perfect cheekbones and shape!


HOW TO CONTOUR: (watch video below to see!)
STEP 1
apply your normal foundation

STEP 2
apply a dark foundation or dark face powder 4-6 shades darker than your actual skin tone to the shaded areas I show above and blend
(make sure you don't use a bronzer with sparkle or shimmer, the sparkle will catch light and draw attention to that area, making it look larger...the opposite of what were trying to do! ha ha)

STEP 3
if you used the foundation or anything creamy to blend (that's how I do it, darker cream foundation, then I go over it with the "mate bronzer", any powder darker than your skin tone will work great)

PRODUCTS I USE TO CONTOUR:
I use any foundation in a shade 5 shades darker than my natural skin color...
I have used BLUNT from MAC (what I'm holding up in the picture above) for a long time...i's totally matte, no shimmer or sparkle..and it looks great on pretty much everyone. ANY face powder that's shades darker than your skin will work great too!
And my super chisel tool: Mini Flat Bronzer from Crown Brush (i LOVE this!!!) CLICK HERE for info on it..it's only $9.50...

LET's get ready to CONTOUR BABY!


dark pants (ha ha ha)...kandee

Tuesday, January 10, 2012

9 New Things From Urban Decay! Naked Palette what!?!

Urban Decay beauty junkies unite! Us Urban Decay fans...eagerly await their launches of whatever they've had up their beautiful, I imagine, tattooed sleeves.....and here's 9 NEW treats from UD!
 Ok, as we know...the Naked Palette 2 seems like it just launched and sent everyone trying to get one for Christmas....and now Urban Decay is ready to ring in the New Year by bringing in some new goodies!

Get ready....these first babies are awesome...I'll tell you why in a sec....but first they've added 4 NEW shades to the 24/7 Glide On Concealer Pencils making it a full set of 8 shades in ALL, but these are the newest in the medium to deeper shades!
from left to right:
*ATF- medium dark golden beige
*DOD- dark/warm tan
*KGB- darker / golden caramel
*M16 - deepest cocoa
I LOVE THESE- here's why-
BEAUTY TIP TIME:
TIP #1. Got a BLEMISH- hide it with these.
Dab some  Urban Decay Eyeshadow Primer on the blemish, then go over it with the concealer pencil and it'll be as good as gone...and covered for 24+ hours baby!
TIP #2- CONTOUR & HIGHLIGHT YOUR FACE LIKE A PRO
Draw On Your Face To CONTOUR & HIGHLIGHT
I took DEA (light peaches and cream color)
&
M16 (deepest cocoa)
And used them as "contouring crayons" & "highlighting sticks".....
HIGHLIGHT AREAS-
down the center of the nose
under the eyes
under the brows
right above the curve up the top lip (to make lips look fuller)
CONTOUR (darker areas)
side of the forehead/ temples
own the sides of the nose (to slenderize and straighten)
above chin and below lower lip (to make lips look full)
in the hollow of the cheeks
END RESULT:
dimensional, contoured and highlighted! YAY!
NEXT UP:
24/7 Glide On Eye Pencils in 3 NEW SHADES
They are waterproof, super pigmented- you better smudge fast, because after 30 seconds of dry time these babies aren't going anywhere!

 from left to righty: (these babies have only been available in gift sets- but not anymore due to the huge demand for these babies to be sold on their own!)
WOODSTOCK- hot pink (fuschia shimmer with micro glitter) this was in the 15 year set...and was one of the most wanted colors! Yes, finally you can put this hot pink on your eyes OR lips!
DEMOLITION- a deep, darkest, matte brown
PERVERSION - matte , blackest carbon black (blacker than Zero)
I have the Perversion Eyeliner on in the picture above too!

The 24/7 Glide-On Eye Pencils come in 26 shades total and one of the greatest things about these is they are packed with nourishing ingredients like Vitamin E, Jojoba and Cotton Seed Oil. Goodie Goods!
WHERE TO BUY: These babies and the concealer pencils are available at Sephora, ULTA, and select Macy's Stores. Or online at Sephora.com, ulta.com, macys.com, beauty.com or urbandecay.com

LAST BUT NOT LEAST.....


SUPER SATURATED HIGH GLOSS LIP COLOR
2 NEW SHADES
on the left- APOCALYPSE - deep berry wine (creme finish)
right - LOVE CHILD- cool pink (creme finish)

These babies are packed with opaque, long-lasting color with anti-feathering, mega-watt shine in a cute chubby pencil.
The ingredients are formula are so delicate, they's get squished in a lipstick form, so safe inside the pencil, these lippy lovies are ready to say "hey we don't have mineral oil or paraffin in us", just pure plant derivatives to hydrate, protect and rejuvenate the delicate skin on your lips!

WHERE TO BUY: These lovelies are only going to be available at Sephora.com

Now your eyes might be NAKED thanks to URBAN DECAY...and your face can look "perfectly naked looking skin"....and they even had something to cover your lips so the only thing on your face that's naked "looking" is your eyes and skin!
 Hip Hip Hoo-Urban Decay!
huge and handfuls of pencils to draw on the face with, your kandee


Wednesday, March 14, 2012

MY FAVORITE BRONZER: VIDEO, TIPS & MORE

 
Get ready to "Bronze it like it's hot"!
NEW VIDEO BELOW!!!!!! YAY!!!

I know, you guys know by now, that my favorite bronzer is BLUNT from MAC.
And despite the scares, of people sending me emails that it's discontinued- it's still available, for now anyways!
So everyone asked for a drugstore "dupe" (another color that matches pretty darn close), option- so I've hunted some down, as well as included some of my fav "shimmer bronzers" for that "J-Lo Glow".
FIRST HERE'S MY TIPS FOR PICKING A BRONZER FOR YOUR SKIN TONE:
You basically want your bronzer to be the color of your skin when you're tanner than you are now!
Fair/Light Skin- my Snow White-esque dolls: pick a bronzer that's beige with pink tones
Medium or Olive Skin: bronzer that's a warm honey-brown
Yellow Tone Skin: make sure your bronzer has a yellow hue like #4 below, but maybe darker
Medium-Dark: a warm orangey-brown
Dark: red-ish brown bronzer
Very Dark:  a cool, blue-brown- think, like  dark chocolate (you can even use an eyeshadow for this too! I like Charcoal Brown from MAC)

BRONZER TIPS:
You can just use a regular face powder in a shade 2-3 shades darker than your natural skin tone, as a matte bronzer.
Here's my BEST MATTE BRONZERS:
Matte Bronzers have no shimmer or sparkle, just "darker bronze" color to contour and add "an insta-tan" effect.

* I love it, but if you're very fair this will be a bit dark. Harmony from MAC is another, lighter option too.


3. MAC SkinFinish Mineralize Powder
(you can ask a mac artist at the store to find a darker shade to use as bronzer)

(this is great for people who struggle with acne, it has Salicylic Acid to help fight off the breakouts!)
*this shade is also a great yellow hue for light, yellow-olive skin tones


SHIMMER BRONZERS:
I like using Bronzers with shimmer, only on areas that I wold highlight- the top of the cheekbones, maybe down the center of the nose. Matte Bronzers are best for real bronzing and contouring. You don't want to look like "sparkle face" all over! ha ha ha
You can't go wrong with any bronzer that gives you multiple colors- they just all blend with the array of colors to look pretty great!
I like:
It's about $26.
But here's my Drugstore Bargain Beauty Finds:
Only about $3!!
*this is great because you can use the one color as a highlighter alone, or use them all.
Only $3, again!
I love this, it's a great alternative to the way pricier, NARS duos.
 Honorable Mentions-
these babies are great, and I can't believe I forgot to include them in them in the video:
I ALSO LOVE:

I own this and love it too.
This was a big recommendation from you guys!

(talc and fragrance free)
I like TARTE because they are natural, no mineral oil, parabens, phthalates and lots of other yucky stuff.

I like the SUN BUNNY, PEACH LEOPARD and PINK LEOPARD BRONZERS.

BRONZER TIP:
It can be all in your application too! This is the brush I use to bronze and contour.
it's on sale right now for around $10.95, I think.

And you can watch, my oldie, but goodie video on HOW TO CONTOUR right here:


And now pretty doll faces, you are ready to "rock the glow" with some Bronzing action.
Comment below- what's your favorite Bronzer?

huge and bronzing, your kandee

Monday, December 27, 2010

SECRET to PERFECT SKIN: PERFECT FOUNDATION

one of the number one questions I get is: all about foundations
so here is my FLAWLESS FOUNDATION APPLICATION on my sister (who makes me laugh all the time...I love this video...because this is how she's been since we we're little)...
HERE' THE LINKS TO ALL THE PRODUCTS I USED, TOO:

FIRST A PRIMER IS ESSENTIAL:
whether you have oily skin or wrinkly skin....I used the PRIMER to blur lines and wrinkles from COVER FX (Click HERE to see the link)
  • A primer makes your skin look extra smooth and flawless
  • It also makes your make-up stay on longer and look wayyyy better

NEXT FOUNDATION:
(I always use 2-  One in a shade slightly more yellow or golden than your actual skin tone (to cancel out the redness) and one 4-5 shades darker than your skin tone to contour and shade)
FIRST I LOVE: 

Laura Mercier Silk Crème Foundation is a rich and luminous foundation offering full coverage while hydrating and protecting the skin. I use this foundation in Hazelnut Beige to apply all over.

THEN I used Make-Up Forever HD Foundation in 5 shades darker (don't know the number I used, it's worn off!)  

CONCEAL THAT UGLY STUFF:

My FAV concealer is COVER FX Foundation (they call it a foundation, but it's so FULL coverage I use it as a concealer) I love this stuff, it's AMAZING!!!


CONTOUR, BLUSH & HIGHLIGHT: 

For Blush I used: POSEY cream color from MAC (any pink will work)

For Contouring I used: BLUNT from MAC (any shade of non-sparkly, dark powder will work)

Highlighting I used:  SHELL cream highlighter from MAC with

Silver Dusk Powder Highlighter on top

LASTLY: I did a once over the eyelids to prepare them or shadow with SOFT OCRE paint pots from MAC


Now let's get ready to get perfect looking skin that will last all day!

Friday, September 30, 2011

Make-Up: Paris Fashion week went a little somethin' like this

RANT in RED: I already typed this post and somehow it got deleted and then I re-typed it went to post it and it deleted it again...so now I need to type it again and I'm sure it won't be as witty, funny or wonderful as the first or second go round..please hang on  before I throw this computer out the window....

Paris Fashion Week- I would love to be there...just imaging it: eclairs, walking around Paris and Fashion- day dream of all daydreams!

so here's as close as I'm gonna get-
Make-Up looks from the Runways of Paris Fashion Week;

ABOVE- it my fav artsy look. Sure it may look like Top Ramen Noodles above her eyebrows- but that's what creativity is for...if it looked like some celebrity's boring, everyday "aren't I hot make-up"...that wouldn't be very creative.

HERE'S WHAT THEY USED at the Manish Arora show:
FACE
M·A·C Pro White Full Coverage and Gesso Eye Shadow — blended through the inner corner of the eyes, browbones, and upper cheekbones to highlight
Dame and Harmony Powder Blush — blended through the crease of eyes, under cheekbones, and through temples to contour
EYE
Pros Aide Adhesive — used to flatten brows to skin Intricate brow appliques were custom designed and adhered with spirit gum 
Studio Finish Concealer — blended through brows to camouflage tone and texture 
M·A·C Pro Emphasize Shaping Powder Pro Palette and Gesso Eye Shadow — blended over the eyelid to create dimension
M·A·C Pro Red Electric Neon Pigment — creates abstract streaked mask design over eyes

this is the Balmain Face Chart and this is what they used:
FACEY PIE:

M·A·C Pro Taupe Powder Blush Pro Palette — blended under cheekbones to contour
EYE AREA:
Brows are lightly shaded to perfect Lashes are curled 
Lofty Brown Zoom Lash Mascara — applied at the root of both upper and lower lashes to define Smolder Eye Kohl — (woot! woot! I loves me some Smolder!) applied through the root of upper lashes, then blended with fingers 
Coffee Eye Pencil — (I own this color but never use it- maybe I'll start) applied through the waterline of lower lashes and then smudged to create an “after party” effect

Me and my homeboy, Rick Owens both love the TANGERINE lip idea for FALL!
I use 2 shades of orange and tangerine lipliner from Make-Up Forever with a matching Make-Up Forever eyeshadow patted on top.
They used:

M·A·C Pro Red, Orange, and White Lipmix — lightly patted onto lips to achieve a matte-stained finish

Ok, so the closest Rick Owens is to being my homeboy is that we both used to work out at the same Gold's Gym in Hollywood (it's probably a 24-Hour Fitness now)...and that was 10 years ago. I know. I'm old. Moving on.
Even his workout clothes were amazing looking. I, on the other hand, looked like I just had on ugly workout clothes.
AND now I present out "what the what!?!" look of the week:
You be the judge...creative HIT or "how the hula hoop can you see with that on your eye" MISS:
It looks like they taped pieces of the "floating" plastic eyeliner to their faces. It is almost as annoying for my to look at as I'm sure it was for the models to try to see.
All I have to say, is it makes me want to say: WHAT'S THAT IN YOUR EYE? Because I know it's not the 4th of July! If that didn't make any sense...CLICK HERE!

I am beyond frustrated with all things internet, computer and technology....
if this post gets deleted...I, well, I don't know what I'll do....because I'll already be up all night editing... me and my computer will not be spending any time apart...
I wish I had an eclair.
Instead of Calgon take me away....I'd rather have "Paris Take me Away" (as in France, not Hilton)
French Toast, French Bread and French Braids
your kandee

Tuesday, June 3, 2014

How and What You Need To Look Like Angelina Jolie as Maleficent:


Now I am not Angelina Jolie, but I did my best to show you how to look like Angelina Jolie as Disney's Maleficent. So here's how to do it and what you need and a little info on her look:

INSIDE MALEFICENT'S LOOK:
1. It was Angelina Jolie's idea to have the Lady Gaga like Cheekbones.
2. Rick Baker created multiple sets of prosthetic cheekbones until the decided on the perfect pair.
3. Angelina Jolie, came up with the design for her colored contacts and was very involved in designing Maleficent's look.
4. Angelina's personal make-up artist, Toni G, did her make-up and applied her prosthetic cheekbones and nose piece everyday.
5. They wanted Maleficent to look beautiful and unlike the "greener" version of Maleficent in Sleeping Beauty.


Here's the I made for How To Do Maleficent Costume Makeup and below I'll list everything I used for the look and how I got the costume:


What I used for Maleficent's make-up:
FOUNDATION: Pale Ivory Foundation (I used Givenchy Photo Perfexion)
CONCEALER, CONTOUR & HIGHLIGHT: RCMA VK Palette in #11
POWDER: any translucent powder
CONTOUR POWDER: Taupe Eyeshadow from MAC (I also used a dark taupe grey from my Ben Nye Essentials palette to add depth to cheekbones at the end)

EYES:
Cream Eye Color: MAC Paint Pot Soft Ochre
White eyeliner for the waterline: OCC Feathered Eyeliner
MAC Eyeshadow colors in: Brun (dark blackish-brown), Concrete (taupe brown), Vex (light pearl with green-grey hue), Ground Brown (dark reddish brown), Goldmine (gold shimmer), Brule (soft Ivory) and I used some grey-brown and black from myP: BEN NYE ESSENTIAL PALETTE
BLACK EYELINER: I used Smolder from MAC applied with an angled brush
MASCARA: any dark black mascara
FALSE LASHES: I used two pairs- Urban Decay lashes in LURE and Flutterlashes in 
Kim

MALEFICENT CONTACTS: I ordered the Maleficent Contacts from Exotic Lenses.
I'm not good with contacts and it took us at least 45 minutes to get one contact in my eye! ha ha ha


BROWS: Dark brown eyebrow gel: Anastasia of Beverly Hills in Ebony

LIPS: Cherry Lipliner from MAC with Urban Decay Super Saturated High Gloss Lipcolor in F-Bomb to replicate the slight-gloss, red that Toni G searched hard to get, that not matte, but not glossy lip color.
*And the MAC RED lipstick is almost an exact dupe from the Red from the Maleficent Collection.


MALEFICENT NAILS: I got acrylic nails put on to look like Angelina's nails in Maleficent, they are much pointier and longer than I'd normally wear, and I used a nude color from Essie, which name I can't remember...ugh:


HOW TO MAKE MALEFICENT HORNS:
Plastic Maleficent Horns which looked like a party favor hat: stuffed with foam and then duct taped to be 3-dimensional, then wrapped with satin strips on a head form, and glued onto plastic:

MALEFICENT COSTUME: I actually had my friend Vanessa Gonzales, who's an amazing costume designer, make the Maleficent collar, cape and brooch. She had to hunt for wire at Home Depot to make the flared Maleficent cape.

MALEFICENT COLLAR: just a piece of black fabric folded and safety-pinned in the back.

I hope you guys liked this and liked learning some extra info on the video! I love you all...
and if you missed it, come watch my new Audrey Hepburn tutorial and let me know if you want me to do a post about all the things I used to create this video too:


If you wanna see what I post all over the internet, come follow me on these babies:
FACEBOOK  *  TWITTER  *   INSTAGRAM  *  PINTEREST  *  YOUTUBE

Wednesday, April 2, 2014

8 Tips To Look Younger With Make-Up


Most times when you add make-up to the face, it just ages everyone, makeup sinks into lines, dark contouring can add more depth that take away from a rounder, youthful appearance....so I'm gonna give you some make-up tips to add some fountain of youth to your face!

Here's my Make-Up Tutorial for how to look as youthful and dewy as possible, BABY FACE SPRAY, not sold anywhere ha ha ha:

TIP #1. GO EASY ON THE CONTOURING
A little contouring can add depth and dimension, but too crazy and you add 5 years to your face. Contouring can add full roundness, but most "how to contour" images I see everywhere, just make someone look aged and a little crazy! If you are going to contour add some highlight to emphasize roundness too!

TIP #2. APPLY A GOOD FOUNDATION & CONCEALER:
Avoid foundations that aren't going for a "non-oily" look, those kinds will dry the skin out too much and give you a more "wrinkle and fine line" look! Cover up under eye circles and the eyelids, this will make you look less red and veiny, and more like baby-face perfection!


TIP  #3. GO EASY ON THE POWDER
Only powder areas that are oily, like the nose, forehead, chin and the eyelids to give an "oil-free" zone to apply eyeshadow, or it will just settle into the creases. Powdering the entire face can give a cake-y, dry look that will exaggerate fine lines and wrinkles everywhere!

TIP#4. ADD SOME PINK!
Pink hues give a youthful, glowy appearance to the face and eyes. Add a soft light pink-pear shimmer to the eyes for  a bright-eyes look, and don't worry it won't LOOK pink, it will just draw the eye in a different way. Pink on the cheeks always look more youthful than any other shade you can use!

MY PERSONAL FAVORITE: The Tarte Cheek Stain in Blushing Bride It's a cream cheek stain so that always makes the cheeks look more dewy, than a dry powder blush alone, and this shade is so pretty I just want to eat it!


YOUTHFUL TIP #5. Darken Up Those Brows Baby!
Just filling in the brows, will give a more youthful frame to your face. As we age, our eyebrows lighten and thin and eventually turn grey, so the darker your brows, the younger you'll look! WARNING: for those looking to take off 20 years, black eyebrows won't do the trick! ha ha ha Always go for a shade that matched the deepest tones of your hair (if you have colored hair, just go with what the natural shade of your hair, or for blondes 1-2 shades darker than you hair)
WHAT I USED IN THE VIDEO: Tarte Amazonian Waterproof Eyebrow Mouse in Taupe applied with a good synthetic fiber, angled brush (*you can even get good and cheap ones at the art & craft supply store)

TIP #6. LIGHTEN UP THE LIPS
Dark colored lips add drama and a little bit of lip-maturity! ha ha For a younger looking kisser, go with a nude-rose-pink colored lip, and a light pink gloss or lip color will make the lips look more youthful and plump!
MY LIP FAVS: Too Faced Perfect Pink Lip Liner, Urban Decay Lip Liner in Naked and Urban Decay Lip Liner in Native (it's a super light nude pink, I use it as a lip color too!)


TIP #7. SKIP THE SMOKEY EYE &  GO FOR A DOE-EYED WING LINER:
Smokey eyes, add a sultry look to the face, which isn't really youthful. A black winged liner on the top lashline, really gives an innocent, yet glamourous look, think Audrey Hepburn- fresh, youthful, yet classic and beautiful!

TIP #8. PASS ON ADDING LINER OF SHADOW TO THE LOWER LASH LINE:
Avoiding the desire to darken the lower lashline, will give a "eyelift" illusion to your eyes and draw the eyes upwards.

Now you're ready to look like "the cutest little baby face"!!

And I hope you loved my "How To Look Younger With Make-Up Video" and my special, extra baby faced, guest, Ellie!

Huge baby-like hugs, your toddler-faced friend, Kandee (ha ha ha)

PS. I'm uploading another video today with a huge announcement! Yayyyy!

Come see what I post all over the internet:
FACEBOOK  *  INSTAGRAM  *  TWITTER  *  PINTEREST  *  TUMBLR  *  YOUTUBE

Friday, February 3, 2012

Before & After: Sick Edition- How to Look Cute When Your Sick


Flu got you feeling ugly?
Has a cold kicked all the cute-ness from your face?
Has a virus, virtually removed all color from your once colorful face?

Here's how to look cute, or at least feel like you look better or cute, when you're sick with a cold, flu, or anything else making you feel "not-so-great"!

As you probably know, I am sick as I type this...and I thought, "hey, what better time than to do a tutorial on how "look better when you don't feel better". And since I don't really like to wear make-up when I'm sick, but you don't want to look so awful and washed out- here's my "make-up tutorial" for when you are feeling yucky.

So sip on some tea, grab your box of Kleenex, and come watch my tips for "how to look cute with a cold" :
(PS. I'll list all the stuff I used below the video, too)

#1. Apply a Self-tanner to give to life and glow back to your face that your cold has robbed from you.
I used: St. Tropez Self Tan Bronzing Mousse

#2. A little foundation can go a long way to knock our the redness of a cold.
I used: L'Oreal VisibleLift Foundation

#3. Conceal the redness of the signature "rudolph the red-nosed sick person", with a little "heavier coverage foundation- it will be creamier than a concealer, which is great for how dry a cold makes the skin and nose area, already.
I used: Cover FX Total Coverage Cream Foundation

#4. Add some contour, dimension and color to your face with concealer pencils. I don't like adding blush or dry bronzers when I'm sick, but you want to add some color so you don't look like your dead with just one foundation color all over.
I used: Urban Decay's 24/7Concealer Pencils (that I love to contour and highlight with- it's so fun, just like you're coloring!) I used it in shade: M16

#5. Powder only where you feel needed. I just powder the eyelid area mostly, because I don't want my foundation or concealer to crease. Any powder will work.

#6. Curl the stars of your face: the lashes and apply your fav mascara!
I used:  Voluminous False Fiber Mascara ( I love this mascara because it makes your lashes truly look like you have fake lashes on, and if that's all I'm going to have for eye make-up, they better dazzle!)

#7. Last but not least- lips need some love and moisture. If you're blowing your nose and drinking as much water as you can, you don't want a bright color lipstick or gloss coming off on your tissue or water glass or tea mug.
I used: Revlon ColorBurst Lip Butter in Sugar Frosting

TIP: And perhaps one of the most important parts when you are sick- after you've kicked your cold or flu, you want to make sure you wash all your brushes that you used while you were sicky and make-sure you disinfect all your make-up (which you should always do anyway). And you don't want to use alcohol because it can dry out and change the consistency of your cosmetics as well as change the pigment too. I love and use BEAUTY SO CLEAN cosmetic disinfecting spray.
I love it because Beauty So Clean has been clinically proven to remove Staphylococcus Aureus, Pseudomonas Aeruginosa and Escherichia Coli (E. coli)

I hope everyone who's sick feels better and if you are not sick, just save this in your "mind library" for the next time a cold or flu sneaks up on you!

bowls of yummy soup, mugs of tea, and lots of huge hugs to you from me, your kandee


Thursday, April 3, 2014

Big News,Magazine Covers, Kim Kardashian, and make-up I used:

Here's the side by side of me recreating Kim K's look....I photoshopped her her on and left the outlines of my hands and legs that were almost as close as Kim K's, and all tell you all the stuff I used in the video below!

This as close to being on the cover of a magazine as I've ever come...and I'm not really on the cover, but here is my BIG NEWS VIDEO to find out more BIG NEWS (and I wasn't squinting my eyes, sultry enough in this picture ha ha)


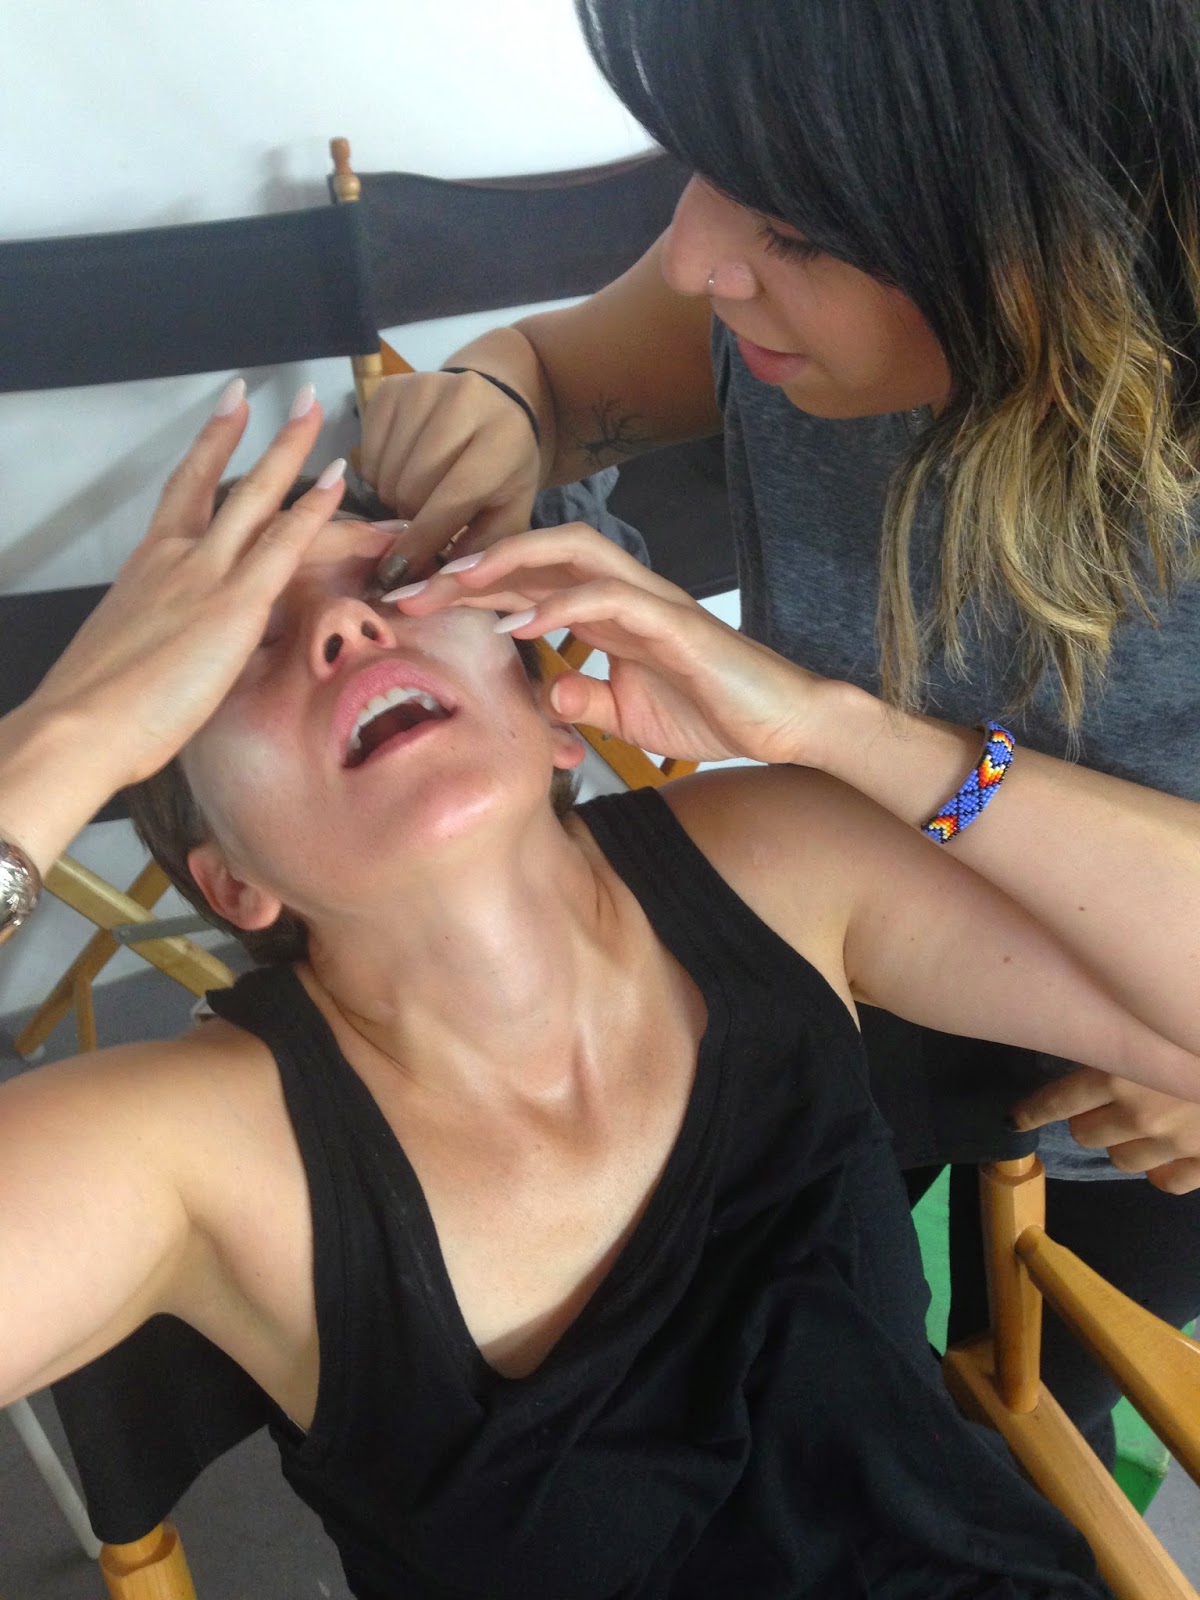
Here's are some behind the scenes iphone-tography pictures I took, and had random other people take, with my phone hee hee:


Here's me as Kim Kardashian, with the awesome sound guy, getting ready to microphone me up for the video.
That is my listening face....

Me closing my eyes, because that's how most of pictures end up, coming out....ha ha ha

Every make-up artist, or girl who doesn't want to mess up her lipstick, needs to carry around a supply of straws. It's like lipgloss and lipstick insurance...you won't smear your lipstick this way!

This pose doesn't look hard, but getting my leg to stay on the little stool and move my hands just like Kim K's was hard, my leg didn't want to be up on that stool! ha ha ha
So, I am beyond excited that I am doing this series with Glamour Magazine! Make sure you subscribe to the Glamour Channel on Youtube so you can see all the videos of all the other celebritiy covers I'll be recreating: CLICK HERE

And here's the VERY FIRST episode of BEAUTY RECOVERED with tips and tricks galore (get it, because I'm recreating the covers...hee hee):


And for even shorter fun, here's Turning Into Kim Kardashian in 30 seconds:


And here'e everything I used to get Kim K's look, I used high end stuff, because I know that's what she uses too, so here it is:

Primer:
Hour Glass No. 29 Primer Potion- click here

Foundation:
YSL Le Teinte Touche Eclat - click here

Concealer:
Givenchy Mister Light - click here

Contour Color:
RCMA VK Palette #11 - click here

Contour Powder:
Benefit Hoola - click here

Blush:
Tarte Cheekstain in Blushing Bride - click here

Highlighter:
Nars Illuminator in 413 Blkr - click here

Powder Highlighter (I actually used an eyeshadow):
Chanel Eyeshadow in Complice - click here

Eyeshadow Palette:
Dior 5 Couleurs Palette - click here

Lip Plumper:
Too Faced Lip Injection Extreme - click here

Lip Liner:
MAC Naked Lip Liner (I used this to line the rims of the eyes and to fill the lips in as lip color) - click here

MAC plum liner to line the edges of the lips

BROWS:
Anastasia of Beverly Hills Dip Brow in Chocolate - click here

LASHES:
I love the Flutter Lashes and this is the "Kim" style too - click here

I hope you guys liked this and thank you all so much, all you guys who've left me the nicest comments on the my channel and the Glamour channel videos! I love you guys so much! It's your support and love and God's blessing that is a true blessing to me!

Huge sultry eyelash winks and hugs form your girl, who totally misses my long hair after these picture, Kandee

Come follow me all over cyber space:
FACEBOOK  *  INSTAGRAM  *  TWITTER  *  PINTEREST  *  TUMBLR  *  YOUTUBE

Monday, April 29, 2013

A Peek At Some of My Make-Up Secret Weapons


This weekend I did make-up for all the girls I did make-up for in my prom videos...because their real prom was this saturday.

And I busted out my make-up secret weapons...all the big-power make-up that are in my make-up artist kit, which I should really call my "make-up luggage" ha ha ha.

Maybe I'll do a video of ALL, or at least most of what's in my kit- it's a lot of pro stuff, that is super powered pigment, super long lasting, and special products for weddings, tv, film, video, and for special appearance and any time anyone needs to look really good, for a long time...ha ha ha

SUPER POWER MAKE-UP ESSENTIALS:

RCMA  "Vincent Kehoe"  or "VK" 18 FOUNDATION & CONCEALER PALETTES- these are the essential foundation/concealer palettes for any make-up artist. You can match ANY and EVERY skin tone from the lightest fair to the deepest dark tone. I remember once when I was key make-up artist for a fashion show that had models of multiple skin tones and nationalities and I had all these make-up artists,  good ones that have their work in big magazines, coming to borrow my RCMA palettes! Because I was perfectly matching every different skin tone, nothing was too yellow, pink, light, orange, dark- because I had ALL my options!
I use these for my own personal foundation and concealer too. You can cover, highlight, contour your face from tan in the summer to lighter in the winter and every shade in between!
 I've used both the #10...

 and #11 palettes for years.
*they are professional grade, which is different than theatrical or "everyday" make-up, they are composed of 50% pigment, which means a little goes a long way and it won't look cakey because of filler ingredients that theatrical  or your average drugstore or everyday make-up has.
*they last a long time, because you use much less than your regular foundation or concealer.
*perfect match and contour and highlight your own face in every season
*they contain no animal product ingredients, perfume, mineral oil, lanolin or petrolatum.
*they only use pure plant oils, natural waxes and FDA approved pigments

*Plus, say hi to the Kehoe family if you order! They are still a small family owned and run company and they care so much about the quality of their products and make-up artistry! They care more about the quality that products, that their father and make-up artist started back in the 60's.


MODEL-IN-A-BOTTLE - I like the SENSITIVE MODEL IN A BOTTLE
*it's a super-powered make-up sealer, that makes your face sweatproof, waterproof, cry proof (good for weddings and tears), and I used this when I was sweating in NYC in August years ago and everyone has make-up melt-down, except for me!

This stuff is amazing, and I use it on everyone for weddings, I used it for the girls for prom, and I used to get bride's emailing me that they slept in their make-up on their wedding night, and woke up looking like I had just finished their make-up- nothing had moved or melted off! ha ha ha ha


YABY GODDESS LIP PALETTE - Yaby was started by my friend and make-up artist, Liz. Again, this is a pro product, it's more pricey because you use less, it contains so much more pigment than "regular" make-up, and the ingredients are not a bunch of fillers like in cheaper make-up. I love this palette because you can make the perfect nude pink or pin-up red!
*And if you order, tell Liz I said hi! She's the sweetest make-up artist, business woman, and mama!


GRAFTOBIAN - I love the Graftobian Cool Blush Palette
Again, this baby is more expensive because you're buying an 8 piece palette, you couldn't buy 8 MAC blushes for $10 a piece! ha ha ha And this is more for professional make-up artist, because the pigment is richer, it lasts lasts longer, and is designed  to look good for HD tv and video. And I love all these shades of pink!


BEAUTY SO CLEAN - I am a semi-germaphobe! So this is not only a must have for make-up artist, but for anyone that wears make-up. I use both the Beauty So Clean Brush Sanitizer (and it's chemical free, unlike most all other brush cleaners) and I use the Beauty So Clean Sanitizing Mist which you can sanitize your blushers, powders, eyeshadow and foundation palettes - everything from your creams to powder products!
*And they release season scents like cupcake, gingerbread and chocolate!
*And say hi to Nancy, if you order- she is also a friend and started as a celebrity make-up artist, who started Beauty So Clean!


BEAUTY BLENDER - I can only sound like a cd on repeat....but I love the beauty blender! My friend Ree Ann, who's also a make-up artist, invented this special shape and special material- that has been tried to be copied- but no one can make it quite like the Beauty Blender! One application of our foundation with this and you will be in love! I found a link  (CLICK HERE) where you can get 2 more almost he same price as 1! And they last forever!

And here's some honorable mentions from on my table...

 MAC To The Beach Body Oil in Seaside - I use this on the girls arms and neck and chest area- to add moisture and a heavenly glisten, without looking all glittery. I used this lighter color on the girls that were light to medium.

And I used this or a mix of the 2 on the medium to darker (AKA more tan) girls...
MAC To The Beach Body Oil in Man Rays

The rest are just some of my brushes....
And please comment below if you want to see me do a video on ALL or at least MOST of the "secret make-up weapons" I have in my make-up kit and I will be doing a video on MAKE-UP BRUSHES:  what each shape is for and how and what I use some of my brushes for!

And if you missed it, before all the girls came over and I set my make-up table up, like above, I uploaded this video for  a "pretty princess updo and a "princess with a twist option":


Huge hugs and make this monday great, no matter what happens, hunt for the happiness, your homegirl, Kandee

PEEK INTO KANDEELAND  *   MY FACEBOOK   *   MY TWEETS   *   WHAT I INSTAGRAM  * WHAT I PUT ON YOUTUBE
Related Posts Plugin for WordPress, Blogger...